| Table of Contents |
|---|
| Choosing version: 1.0 vs. 2.0 & Quantity |
| Setup by Quantity |
| Pimax Play/EVO Setup |
1 Like
Choosing version: 1.0 vs. 2.0 & Quantity
- Before you drill holes in your walls or buy tripods, you need to know which hardware you’re holding.
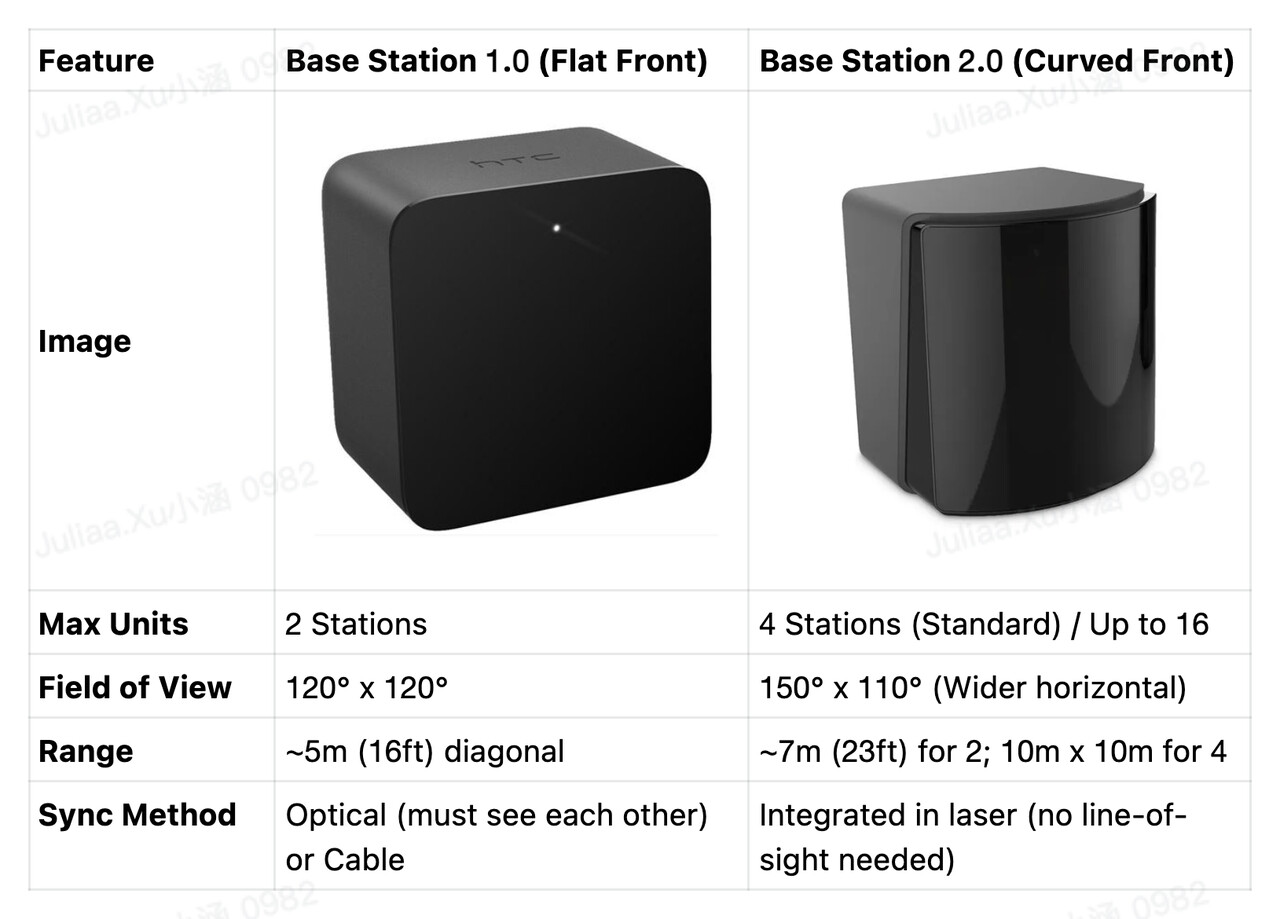
[!warning] Watning: You cannot mix 1.0 and 2.0 base stations in the same setup.
[!warning] Lighthouse v2.0 not compatible with LH v1.0 tracked accessories! ie Vive Wands v1.0 & Vive Tracking Pucks v1.0
[!info] Lighthouse v1.0 compatible with both v1.0 & v2.0 tracked accessories.
-
1 Base : If you are strictly seated in a cockpit, one station mounted in front of off to one side is often enough. It allows you to “lean” into your mirrors and gauges with zero drift.
-
2 Bases: The standard. Place these in opposite corners. This provides 360° coverage for most titles.
-
3-4 Bases: If you use Full Body Tracking or find yourself losing tracking when you reach for the floor, adding a 3rd or 4th station virtually eliminates “occlusion” (when your body blocks the laser).
Setup by Quantity
Common Rules for All Setups:
-
Height: Mount them at or above head height (ideally 2m / 6.5ft).
-
Angle: Tilt them down 30°–45° toward the center of your play area.
-
Reflections: Cover mirrors, glass doors, or TV screens, as they confuse lasers.
If you have 1 Base (Seated Only)
-
Placement: In front slightly to left or right, slightly above eye level.
-
1.0 Setup: Press the button on the back until the channel shows “A”.
-
2.0 Setup: No special channel needed; it will just work on its default.
If you have 2 Bases (Standard Room-Scale)
-
Placement: Opposite corners of your play area, facing each other.
-
1.0 Setup:
-
Wireless Sync: Set one to “b” and the other to “c”. They must have a clear line of sight to each other.
-
Cabled Sync: If they can’t see each other, use the long sync cable and set them to “A” and “b”.
-
-
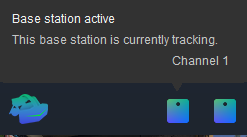
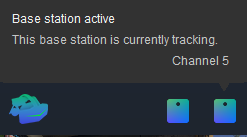
2.0 Setup:
-
Plug them all in.
-
Open SteamVR > Settings > Base Station > Configure Base Station Channels.
-
Ensure each station is on a unique channel (e.g., 1, 5). SteamVR can auto-assign these via Bluetooth. They do not need to see each other.
-
If you have 3 or 4 Bases (2.0 Only)
-
Placement: For 4 bases, place one in each corner of a square/rectangle. For 3, place them in a triangle.
-
Setup: Same as above 2 bases for 2.0 setup and ensure each station is on a unique channel (e.g., 1, 2, 3, 4).
-
In case you want to swap the channels, press the small pinhole button on the back of the device while it is powered on.
“Reserved for Pic”
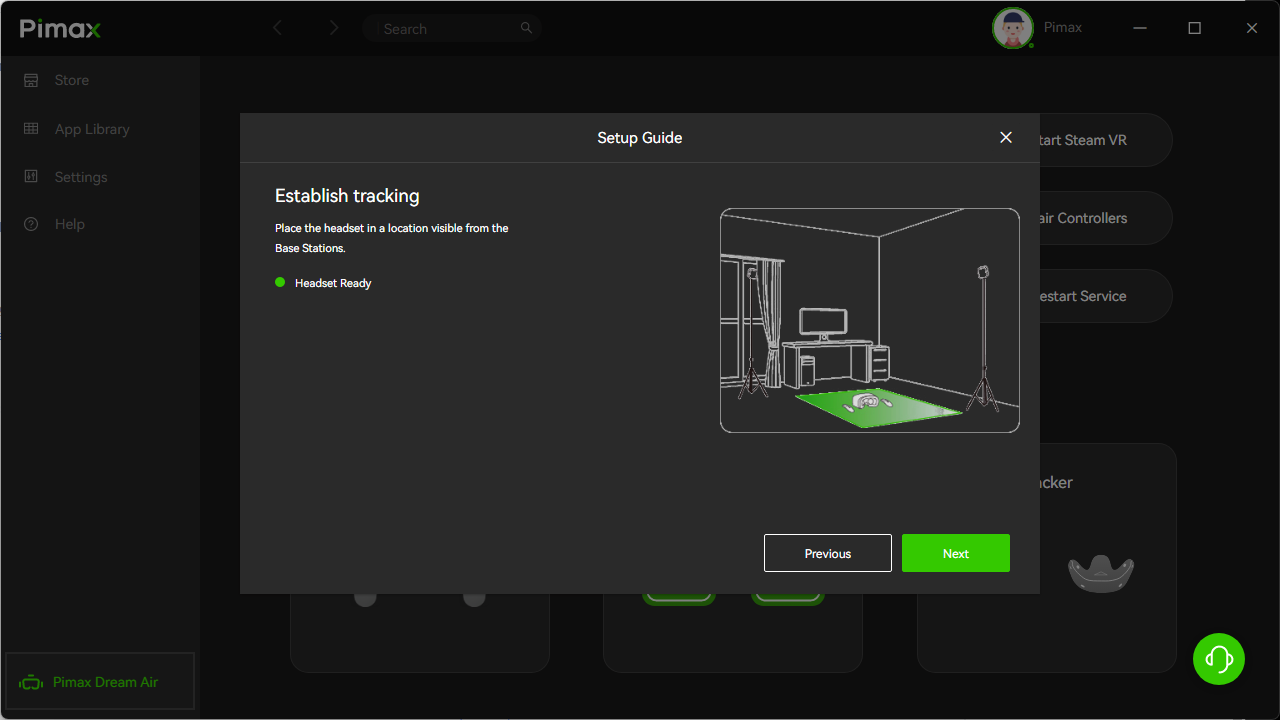
Pimax Play/EVO Setup
For the Dream Air Series (Dream Air / Dream Air SE)
The Dream Air series streamlines the process, but you must ensure you have the correct hardware version.
-
Confirm you have the Dream Air Lighthouse version.
-
Simply connect your headset to your PC. Pimax Play/EVO will automatically recognize the tracking mode.
-
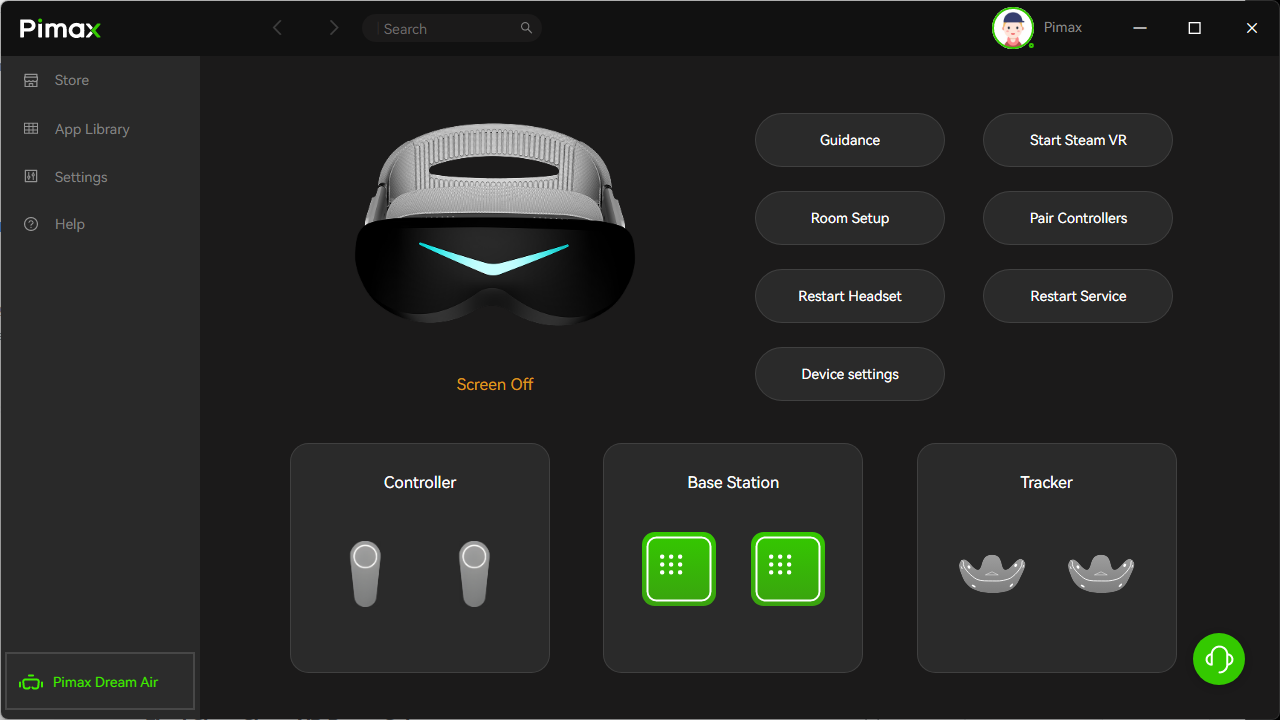
Just like the Crystal, a successful connection will be indicated by the Base Station icon lighting up in the Pimax Play/EVO interface.
For the Crystal Series (Crystal / Crystal Light / Crystal Super)
The Crystal series is modular, meaning you need to ensure the hardware and software are in sync.
-
Ensure your Lighthouse Faceplate is installed.
-
Open Pimax Play/EVO and navigate to Device Settings. Manually switch the tracking mode to “Lighthouse.”