INFORMATIONS ABOUT THE CALIBRATION PROCESS
The calibration process is made using Virtual desktop too.
The calibration software displays reference colors that will be read by the colorimeter probe.
Those reference colors can be displayed fullscreen, or with smaller patches, or fullscreen but with some information windows left depending on the calibration software, so you have to increase the size of the virtual screen in virtual desktop to the maximum to ensure the whole panel of the headset will be filled with this reference color, with nothing else that could bias the colorimeter probe readings. Also put the HMD in large mode in pitool to have the widest area filled on the HMD panel.
I have first tried to calibrate through the lens (putting the calibration probe onto the lens). I have created an ICC profile and watched the resulting improvement with a few pictures displayed in the 5K+ and colors already looked more natural. Now while it seems I was able to obtain a interesting result this way, I haven’t double checked this resulting profile with the HCFR software like I did above in the tech part. And when I load this profile onto my desktop monitor the color drift is much more pronounced than with the other profile I have made without the lens.
So I don’t think this first profile created through the lens can come close to the accuracy of the 2nd one made without the lens. When I have first tried through the lens it was obvious the location of the calibration probe onto the lens was significantly affecting the readings from the probe. Moving the probe a few millimeters was inducing big changes in the read values. I had to do a lot of tries to first find the best probe location, where the ∆E for primary colors were the best, and even then I couldn’t be sure some godrays or any other lens artifact weren’t interfering with the probe readings.
This is why I have jumped into removing a lens so that the probe can be placed over the flat separator protecting the panels from dust. The best would have been to put the probe directly onto the panel itself but this implies a risky tear down of the headset. Now, the result I have obtained seems to prove placing the probe over the protective separator is a good enough compromise to obtain a nice calibration profile. Also the colorimeter probe location was much less critical with the lens removed. I still took care to place it to the middle so it receives the maximum light to read (as there is a noticeable gap between this protecting separator and the panel) but I could move it around the center without getting significant changes in the probe readings.
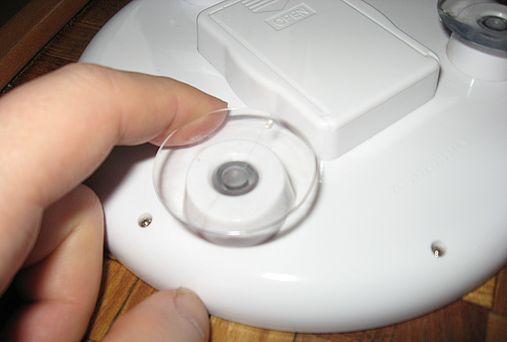
If you wonder how to remove a lens, I have searched this forum and found useful infos about how to do it but it was not specified if the stretchable black fabric around the lens had to be removed or not. So if you wonder about that I can confirm it is not necessary. Also as already explained by others in this forum an easy way to remove the lens is to use a suction cut you place at the far end of the lens (near the nose) and pull up until the glue peels. It is some soft glue (like a mastic) located at the left and right extremity of the lens, so just pull on the suction cup with a constant force and wait until you feel the glue peels (if it doesn’t, then apply progressively more force, and check you have placed the suction cup the most near the lens extremity).
Here is a picture of the suction cup I have used, taken apart from a small mirror:
Last thing about double checking the ICC profile with HCFR calibration software:
This software can’t “load” an ICC profile so you could check the result of it. Still this software lets you do that for a monitor or a TV as you can load the profile you want to check to windows and the correction will apply to the test colors displayed by the HCFR software.
Unfortunately when doing this the correction is not applied when passing through virtual desktop: the test colors are corrected on the monitor (by the ICC profile) but not into the HMD. So I have had to find a workaround.
The HCFR software has another mode in which the reference colors can be displayed manually, using a specific DVD, instead of having this automated by the internal color generator of the software.
So I have created a set of color patches that is a copy of all the colors used by HCFR software and I have used the photo editor software (paint shop pro) to display them manually with the ICC profile correction applied.
The process was then to prepare (in paint shop pro) the color I want to test, then click the button to start the probe reading and immediately alt-tab to paint shop pro displaying the corrected test color.
A bit more painful process but at least it worked.
The most boring part was to recreate this set of testing color patches so I have uploaded that for people who would have to follow this same procedure for their own calibration:
http://www.mediafire.com/file/5i4t87z9uudvpma/HCFR_reference_test_colors.rar/file